

Vacuum Bagging Process & Equipment for Composites
Vacuum bagging is how a composite shop turns a hand layup into a dense, void-free part. The process uses atmospheric pressure to compact the laminate, pull trapped air out of the stack, and drive off excess resin while the part cures. For production engineers running fiberglass or carbon fiber work, matching the right bagging materials to the right vacuum source is what separates a consistent part from a scrap pile.
The Bottom Line
The vacuum bagging process seals a wet composite layup inside an airtight bag, then evacuates the air so atmospheric pressure presses the laminate against the mold. That pressure consolidates the plies, removes voids, and raises the fiber-to-resin ratio, which produces a stronger, lighter part than hand layup alone. A working setup needs a vacuum source, bagging film, sealant tape, peel ply, release film, separate breather and bleeder layers, and a vacuum port with a gauge. On repeat production parts, a reusable silicone bag can replace single-use film and cut the cost and setup time of every cycle.
What You’ll Find
- What Is the Vacuum Bagging Process?
- Vacuum Bagging Equipment and Materials
- The Vacuum Bagging Process, Step by Step
- Vacuum Bagging vs. Autoclave and Other Composite Methods
- Common Vacuum Bagging Defects and How to Avoid Them
- Reusable vs. Single-Use Vacuum Bagging
- Reusable Vacuum Bagging for Composites with Smartech
- Frequently Asked Questions
What Is the Vacuum Bagging Process?
Vacuum bagging is a composite molding process in which reinforcement and resin are laid into or onto a mold, sealed inside an airtight film, and then placed under vacuum. Removing the air collapses the bag against the laminate and holds it there for the full cure, so the part takes the shape of the mold under even, continuous pressure.
The pressure comes from the atmosphere, not the pump. When the pump evacuates the bag, the air outside pushes inward against the whole surface at once. At sea level a perfect vacuum yields up to 14.7 psi of compaction, and that figure falls by roughly 0.5 psi for every 1,000 feet of altitude. The pump only removes air; the atmosphere does the pressing.
That even pressure is what makes the part. It squeezes plies together, forces out trapped air before it can cure into voids, and pushes excess resin into the breather, raising the fiber-to-resin ratio. The result is a laminate that is stronger, lighter, and more repeatable than one consolidated by hand.
Vacuum Bagging Equipment and Materials
A vacuum bagging stack is built in layers, each with a job. Below is the equipment most composite operations rely on, in roughly the order it goes down on the mold.
Vacuum source and pumps
The vacuum source is the powerhouse of the operation. Most shops run a positive-displacement pump, usually a reciprocating piston or rotary vane type, though turbine, diaphragm, and Venturi units all have a place. Piston pumps pull deeper vacuum but run louder and with more vibration; rotary vane pumps move more air for a given rating, tolerate small leaks better, and run more smoothly. Venturi generators driven by shop air are a low-cost option for smaller jobs. Whatever the type, rate a pump on two numbers: the vacuum level it can hold and the volume of air it can move. The right pump holds a continuous vacuum until the resin reaches full cure, which can take 8 to 24 hours depending on the resin system and ambient temperature.
Bagging film and sealant tape
The bagging film is the airtight envelope over the whole stack. It is usually nylon or polyethylene and is cut oversized to wrap into corners without stretching. Sealant tape, also called tacky tape, runs around the perimeter and seals the film to the mold. The tape only seals well on a clean surface, so keep the bond line free of stray resin and fibers. At sharp corners, fold a pleat into the film so the bag can conform to the part instead of bridging across the edge.
Peel ply and release film
Peel ply, or release fabric, goes directly on the wet laminate and leaves a textured, bond-ready surface when stripped off, which cuts the prep needed before secondary bonding. Release film sits above it and controls how much resin escapes. A perforated film lets a measured amount of resin bleed through; a solid, non-porous film such as FEP holds the resin in while still letting air and volatiles out. The film and the hole pattern are how you dial in resin content rather than leaving it to chance.
Bleeder and breather layers
These two layers are often confused, and treating them as one is a common reason parts come out resin-rich or porous. The bleeder sits over the release film to absorb excess resin pulled out of the laminate; you add or remove plies to control how much resin leaves the part. The breather, sometimes called a baby blanket, sits higher in the stack and keeps an open air path to the vacuum port so pressure stays even across the whole surface. On a part that needs heavy resin removal, a separator film between the two keeps the bleeder from feeding resin straight into the breather.
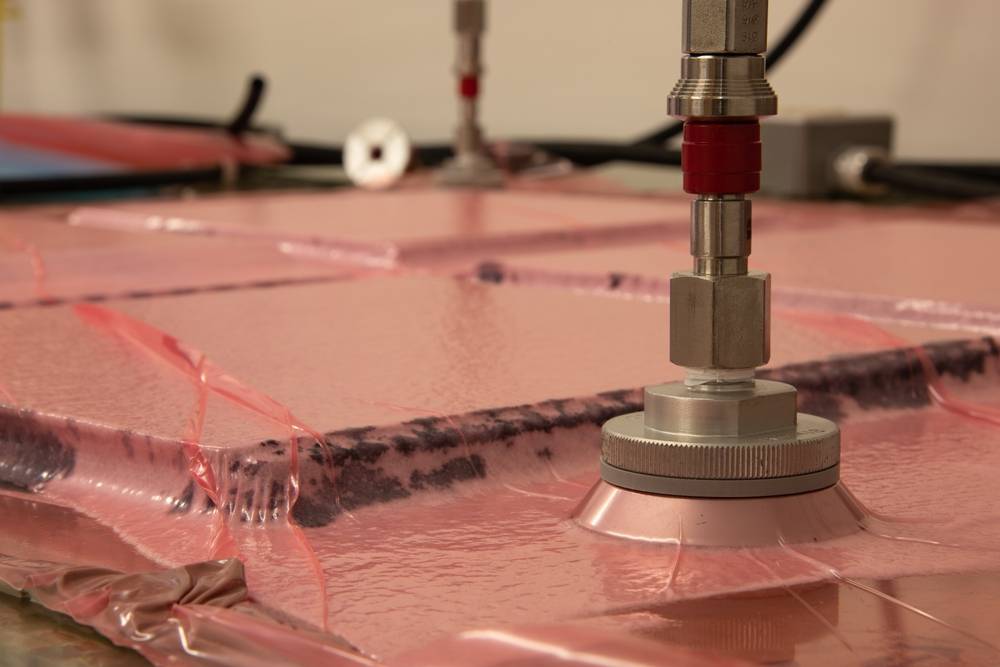
Vacuum port, line, and gauge
The vacuum port is the fitting that bridges the inside of the bag and the vacuum line. The line is an airtight hose rated for crush resistance and, if the part cures hot, for heat. A vacuum gauge tells you how much pressure is actually on the part; aim for at least 10 inches of mercury to consolidate properly, and watch the gauge through the cure to catch a leak before it ruins the laminate.
The Vacuum Bagging Process, Step by Step
The exact stack varies by part, but the sequence below covers a standard wet-layup bagging cycle from a clean mold to a finished part.
- Prepare the mold. Clean the mold and apply a release agent so the cured part releases cleanly.
- Lay up the reinforcement. Place the fiberglass or carbon fiber to fit the mold and wet it out with resin for full, even coverage.
- Debulk if needed. On thick or contoured layups, pull an intermediate vacuum to compact the plies before adding the rest of the stack.
- Add peel ply and release film. Lay peel ply on the wet laminate, then the release film to control resin bleed.
- Add bleeder and breather. Place the bleeder to absorb excess resin, then the breather to keep an even air path to the port.
- Seal the bag. Lay the bagging film over the stack, press it into the sealant tape with pleats at the corners, and leave a spot for the port.
- Pull vacuum. Start the pump, watch the gauge climb, and check the perimeter and port for leaks.
- Cure. Hold continuous vacuum until the resin reaches full cure, adding heat if the resin system calls for it.
- Demold, inspect, and finish. Shut off the pump, strip the consumables, release the part, then inspect, trim, and finish it.
Vacuum Bagging vs. Autoclave and Other Composite Methods
Vacuum bagging is one of several ways to consolidate a composite, and the right choice depends on the part, the volume, and the equipment on hand. A vacuum bag on its own caps out near 14.7 psi. An autoclave adds external pressure on top of vacuum, often several hundred psi, to drive down porosity on demanding structural parts, but the bag is still required to extract gas. Out-of-autoclave processes aim for autoclave-grade quality using vacuum and an oven, which suits shops without autoclave capacity.
Vacuum bagging also overlaps with resin infusion, prepreg, and wet layup. Wet layup with a vacuum bag is the most accessible; prepreg trades shelf life and cold storage for tighter resin control; infusion pulls resin through dry fabric under vacuum for large, low-void parts. For a closer look at where bagging fits, see vacuum bagging composites, and for high-modulus work, carbon fiber vacuum bagging walks through the part-specific setup.
Common Vacuum Bagging Defects and How to Avoid Them
Most bagging defects trace back to pressure that was uneven, lost, or misjudged. Knowing the failure modes makes them easy to catch before cure.
- Bridging. When the bag spans a corner instead of folding into it, that area never sees pressure. Pleat the film at every corner and contour.
- Vacuum loss. A leak at the tape or port bleeds off pressure mid-cure. Seal carefully, and watch the gauge so a slow leak does not go unnoticed.
- Voids and porosity. Trapped air or volatiles cure into voids that cut strength. Adequate breather, full wet-out, and a clean vacuum path keep them out.
- Resin-rich or resin-starved areas. Too little bleed leaves a heavy part; too much leaves dry spots. Tune the bleeder plies and release-film perforation to the resin content you want.
Voids and poor consolidation are also a leading cause of downstream failures such as delamination. Smartech’s guide to composite delamination covers the causes and prevention in more depth.
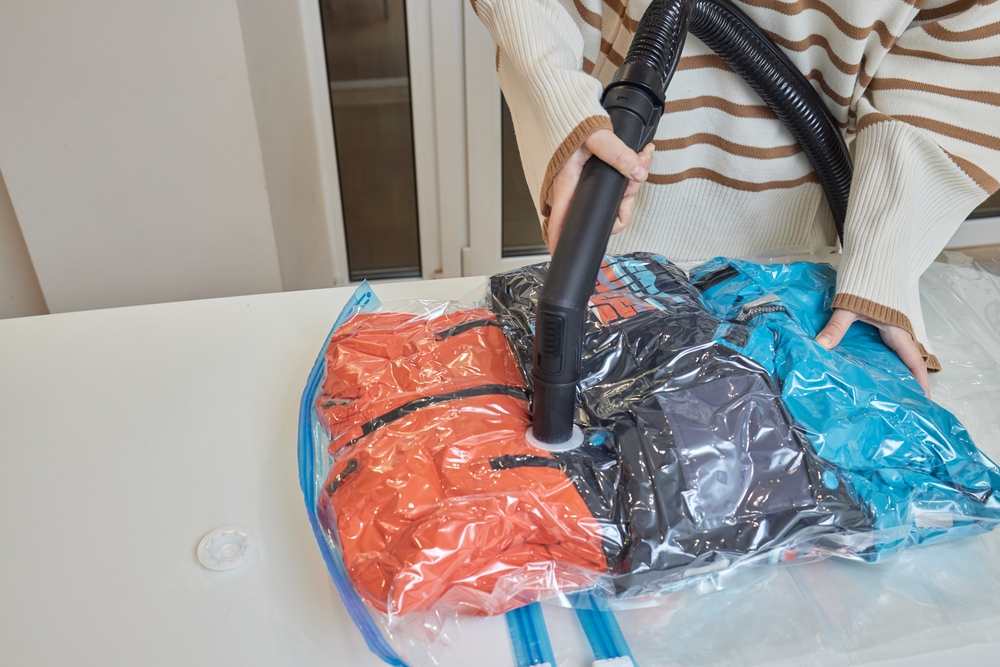
Reusable vs. Single-Use Vacuum Bagging
Single-use bagging film is cheap per sheet, but every cycle means cutting, pleating, taping, and discarding a fresh bag. On repeat parts, that labor and waste adds up fast. Reusable bagging swaps disposable film for a molded silicone membrane sized to the part, and the savings compound across a production run.
- Lower cost per part. One membrane replaces hundreds of disposable bags, dropping the consumable cost of each cycle.
- Faster setup. A pre-formed membrane needs no pleating or taping, so parts turn around quicker.
- Less waste and labor. Fewer expendables and simpler handling mean less material in the bin and less skilled time per cycle.
- More consistent parts. A repeatable membrane delivers the same pressure every time and conforms to complex shapes.
Read: The Advantages of Reusable Vacuum Bagging in Composite Manufacturing
Reusable Vacuum Bagging for Composites with Smartech
Smartech is the North American distributor for Steinbach AG, and has supplied composite manufacturers with specialty membranes and bagging since 1998. For shops moving off single-use film, Smartech’s reusable vacuum bagging for composites is built around Steinbach silicone bags made to your part, with choices in durometer, valve fittings, and surface texture so the membrane matches the job rather than the other way around.
For forming and pressing work, the same expertise extends to silicone membranes for composite forming. Smartech’s team advises on what will actually work for your layup, not just what is in stock, and that application support is the point. If membranes are wearing out early or parts are coming out inconsistent, contact Smartech to spec the right setup for your process.
Frequently Asked Questions
What is the purpose of a vacuum bag?
A vacuum bag seals a composite layup so the air inside can be evacuated. Removing that air lets atmospheric pressure compact the laminate evenly, which forces out trapped air and excess resin and consolidates the plies into a denser, stronger part.
What are the disadvantages of vacuum bagging?
Vacuum bagging adds materials, setup time, and a leak-tight seal to manage, and a single-use stack generates waste on every cycle. Compaction also caps near 14.7 psi at sea level, so parts that need higher pressure call for an autoclave. Reusable membranes offset much of the setup and waste cost on repeat work.
What is the process of autoclave vacuum bagging?
Autoclave bagging uses the same vacuum stack, then places the bagged part inside a pressurized, heated autoclave. The vacuum extracts gas while external pressure, often several hundred psi, drives porosity down further. It is used for demanding structural and aerospace parts where a vacuum bag alone cannot reach the required quality.
What is vacuum bag molding?
Vacuum bag molding is another name for the vacuum bagging process: a one-sided mold holds the laminate while a flexible bag and atmospheric pressure consolidate it during cure. It is a flexible, lower-tooling-cost route to quality composite parts compared with matched-die molding.
How much vacuum pressure do you need for vacuum bagging?
Aim for at least 10 inches of mercury on the part to consolidate it properly, and confirm it on a gauge. The practical ceiling is about 14.7 psi at sea level, dropping roughly 0.5 psi per 1,000 feet of altitude.
Can vacuum bags be reused?
Disposable film bags are made for a single cycle, but molded silicone membranes are designed to be reused across hundreds of cycles. On repeat production parts, a reusable membrane lowers cost per part and cuts setup time.
Looking for More Information?
Check out our Resources or Contact Us